 Pin it
 My nephew called me in a panic two weeks before his graduation, asking if I could make a cake for his party. I'd never piped anything fancier than a smiley face before, but something about the urgency in his voice made me say yes immediately. Standing in the kitchen at midnight, flour dusting my apron, I realized this wasn't just about baking—it was about showing up for someone on a day that mattered. This simple vanilla sheet cake became my unexpected love letter to milestone moments, the kind where a homemade dessert says more than store-bought ever could.
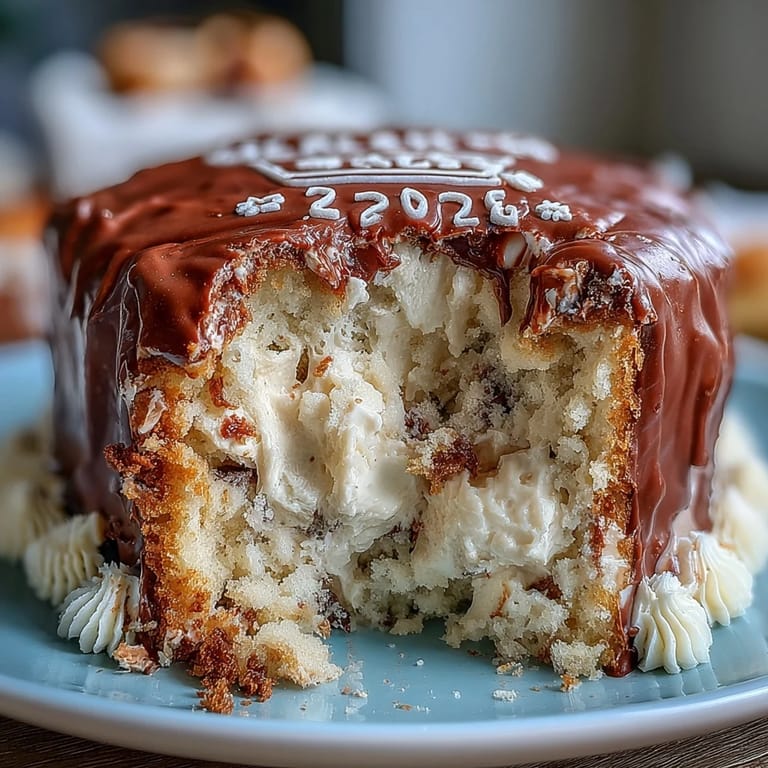
I'll never forget the moment I piped that first wobbly 2 on top of the frosting. My hand shook a little, the buttercream came out thicker than expected, and I made a mental note that baking under pressure is its own kind of courage. But when my nephew saw it—really saw it, with those tired but happy graduation eyes—he hugged me so hard the cake nearly toppled off the counter. That's when I understood: this cake wasn't about perfection; it was about presence.
Ingredients
- All-purpose flour (2 ½ cups): The backbone of your cake; measure by spooning into the cup and leveling off, not scooping straight from the bag, or you'll end up with a dense disappointment.
- Baking powder (2 ½ tsp): This is your leavening agent, so make sure it's fresh—old baking powder won't give you that light, airy crumb you're after.
- Salt (½ tsp): A pinch that rounds out the sweetness and lets the vanilla shine without tasting salty.
- Unsalted butter (1 cup, softened): Room temperature is non-negotiable here; cold butter won't cream properly and you'll miss that fluffy texture that makes this cake special.
- Granulated sugar (1 ¾ cups): The granules help aerate the butter as you beat it, creating that light, cloud-like base for everything else.
- Large eggs (4, room temperature): Cold eggs don't incorporate smoothly, so pull them out about 30 minutes before you start baking.
- Vanilla extract (1 tbsp): This is the soul of the cake, so don't skimp on quality—real vanilla tastes like a celebration.
- Whole milk (1 cup, room temperature): The temperature matters because it won't shock the batter and break the emulsion you've carefully built.
- Unsalted butter for frosting (1 cup, softened): Same softness rule applies; you want this to be almost cloud-like when you start beating.
- Powdered sugar (4 cups, sifted): Sifting removes lumps and makes for silky frosting—don't skip this step, or you'll bite into grittiness.
- Milk for frosting (¼ cup): This loosens the frosting to the perfect spreadable consistency without making it greasy.
- Vanilla extract for frosting (2 tsp): A smaller amount here keeps the frosting from tasting too boozy, just enough vanilla to remind you it's the real thing.
- Food coloring: A few drops go a long way, especially with gel colors, so start small and add more if you want bolder school colors.
Tired of Takeout? 🥡
Get 10 meals you can make faster than delivery arrives. Seriously.
One email. No spam. Unsubscribe anytime.
Instructions
- Prep your pan and heat your oven:
- Preheat to 350°F (175°C) and grease that 9x13-inch pan like your life depends on it, then line it with parchment paper so your cake slides out without drama. Cold pans and hot batter don't mix well, so give your oven a few extra minutes to reach temperature while you gather everything else.
- Build your dry team:
- Whisk flour, baking powder, and salt together in a medium bowl—this distributes the leavening evenly so you don't end up with random tunnels in your cake. It takes about 30 seconds and makes all the difference between a flat cake and a fluffy one.
- Cream butter and sugar like you mean it:
- Beat them together for a full 3 minutes until the mixture looks pale, fluffy, and almost cloud-like. This is where the air gets incorporated, and rushing it means a denser crumb, so set a timer and don't be tempted to skip ahead.
- Add eggs one by one:
- Each egg gets beaten in fully before the next one arrives, which helps them emulsify smoothly into the butter mixture. If you dump all four in at once, you risk a curdled, broken batter that never quite recovers.
- Mix in the vanilla:
- Just a quick stir after the last egg, letting it blend into the sweet, eggy base.
- Alternate flour and milk in three parts:
- Start with flour, then milk, then flour again—this keeps the batter from breaking and ensures you don't overwork the gluten. Mix just until combined; a few lumps are fine, but overmixing creates a tough cake nobody asked for.
- Pour and smooth:
- Get the batter into that prepared pan and use a spatula to level it out so it bakes evenly. A little unevenness is fine; it just means you get some thicker, gooier cake at the edges, which honestly isn't the worst problem to have.
- Bake with patience:
- Bake for 30–35 minutes until a toothpick inserted in the center comes out clean with maybe one or two crumbs clinging to it. Every oven is different, so start checking around the 30-minute mark.
- Cool completely:
- This is the hardest part because it smells incredible and you want to frost it immediately, but a warm cake will turn frosting into soup. Leave it in the pan on a wire rack until it's completely cool to the touch—at least an hour.
- Make frosting magic:
- Beat softened butter until it's creamy and pale, then gradually add sifted powdered sugar so you don't create a powdered sugar explosion in your kitchen. Add milk, vanilla, and salt, then beat for 3–5 minutes until it's fluffy and spreadable.
- Frost with confidence:
- Spread an even layer over the cooled cake using a spatula, making sure you get into the corners. Don't stress about it being perfectly smooth; this is a celebration cake, not a wedding cake.
- Pipe your message:
- Fill a piping bag with colored buttercream and that small round tip, then write Class of 2026 right across the top. Take a breath before you start; shaky hands make it look more personal anyway.
- Decorate and admire:
- Scatter sprinkles or other edible decorations around, step back, and feel that small glow of accomplishment that comes from making something beautiful for someone you love.
 Pin it
 A few days after the graduation party, my nephew texted me a photo of the leftover cake in his fridge with the caption, Mom kept asking when you're making another one. In that moment, I realized that this simple cake had somehow become a thing people asked for, not because it was fancy, but because it carried a story and tasted like someone cared enough to show up on a important day. That's what I love most about this recipe.
Make-Ahead Magic
The best-kept secret about this cake is that it gets better with time. Bake it the day before your celebration, wrap it unfrosted, and let it sit at room temperature—the crumb actually relaxes and becomes more tender overnight. Then frost it a few hours before guests arrive so the buttercream sets just enough to look intentional but still tastes fresh and creamy. If you're really planning ahead, you can even freeze the unfrosted cake for up to two weeks; just thaw it at room temperature before frosting, and nobody will ever know you baked it weeks earlier.
Personalizing Your Celebration Cake
This cake is a blank canvas waiting for your specific moment. Use school colors in the buttercream, or try ombre piping where one color fades into another for something Instagram-worthy without actually trying too hard. If someone has a favorite color or a funny inside joke, work that into the design—I've seen people pipe little graduation caps, numbers, or even names, and every version feels special because it's tied to that exact person and that exact day. The cake doesn't need to be complicated to feel meaningful; sometimes the sweetest gestures are the simple ones.
Storing and Serving Tips
This cake is forgiving about storage, which is one of its greatest strengths. At room temperature, it stays fresh for about two days, which gives you flexibility if your party runs longer than expected or if you need to keep some for stragglers. Refrigerate it for up to five days if you want it to last longer, and the buttercream will stay firmer and more stable in the cold, so it's actually easier to serve neat slices. If you go the dairy-free route, just make sure all your substitutes are dairy-free—coconut oil buttercream works beautifully, though it stays softer than dairy butter, so chill it before frosting.
- Slice with a warm, dry knife, wiping it clean between cuts, so you get neat edges instead of crumbs everywhere.
- If you're serving it outdoors on a warm day, keep it in a cooler with the frosting side up and uncover it just before cutting.
- Leftover cake actually tastes even better on day two, when the flavors have settled and the crumb has become even more tender.
 Pin it
 This cake taught me that the best recipes aren't the ones that demand perfection; they're the ones that meet you where you are and help you celebrate what matters. Make it, frost it, write something meaningful on top, and watch the moment it becomes more than just dessert.
Recipe Questions & Answers
- → What type of pan is best for this sheet?
A 9x13-inch sheet pan lined with parchment paper ensures even baking and easy removal.
- → Can I use non-dairy milk in the batter and frosting?
Yes, non-dairy milk substitutes can be used to accommodate dietary preferences while maintaining moisture.
- → How do I achieve vibrant piping colors?
Use gel or paste food coloring added to portions of the buttercream for bold, vivid hues perfect for decorations.
- → What is the best way to store the finished cake?
Store the cake covered at room temperature for up to two days or refrigerate for up to five days to maintain freshness.
- → Can almond extract be added for extra flavor?
Adding a half teaspoon of almond extract to the batter enhances flavor without overpowering the vanilla base.